Pav Bun
Prep Time: 15 – 20 mins | Proof time: 90 mins | Cook Time: 20 mins | Makes: 14 Buns
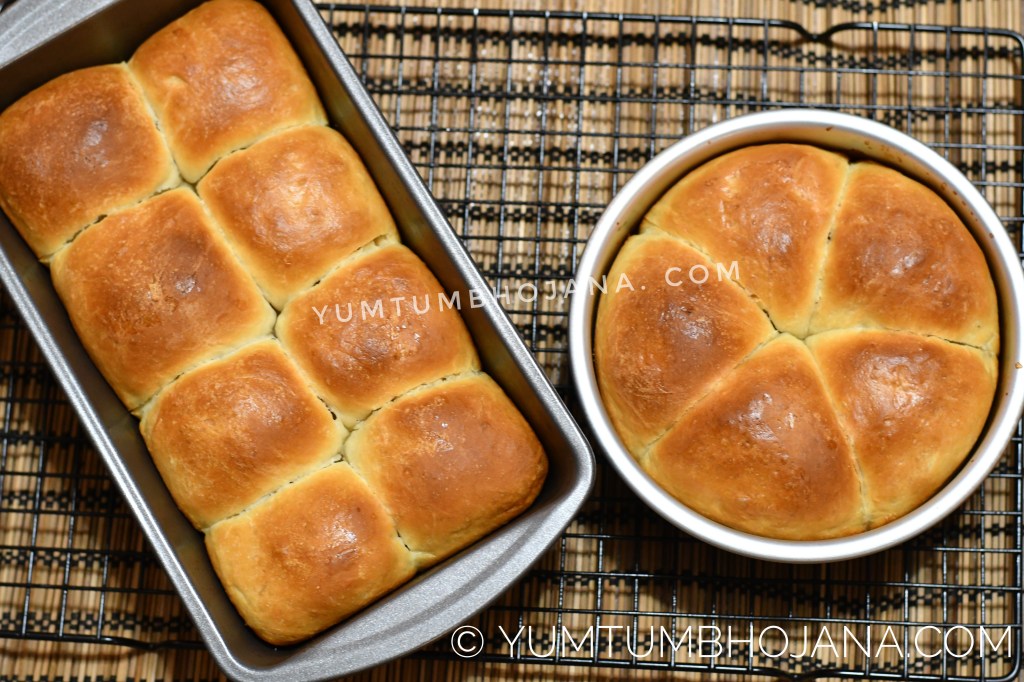
Pav Bun are one of the most widely used buns for making Pav Bhaji or Vada Pav which are popular under the chaat category. These soft and fluffy buns are eggless and usually made with All purpose flour or Maida. After moving to US, I did not like any of the soft buns available here to go with Pav Bhaji. Though I have used it most of the time when I crave for the same. Ever since the lockdown started and with a baby at home I couldn’t go out anywhere and/or get anything from outside (You all know everything was out of stock 😦 ). So, eventually I started experimenting with bread flour as I heard that it has some extra protein compared to APF. After couple of failed attempt here is my go to recipe which I am happy to share with you all 🙂
Ingredients
Bread flour – 2.5 cups
Sugar – 2 tsp
Salt – 1 tsp
Milk – 1 cup
Butter – 1/4 cup + 1 tbsp (for greasing)
Instant dry yeast – 1 tsp
Method
- Take all the dry ingredients into a bowl and mix it well.
- Make a well in the center and add milk little by little at a time and mix everything well to form a sticky dough.
- Add the butter and mix it will into the dough so that all the butter are incorporated into the dough.
- Take the dough on to a flat work surface or on to the kitchen counter top and knead the dough by stretching with the base of your palm, fold and stretch again. This step helps in the formation of gluten and give a fluffy texture to the buns after it’s baked.
- Repeat step 4 for 10 to 12 mins. Ensure your dough is smooth at the end of this step.
- Grease a deep bowl with little butter and place the dough. Apply some butter on the dough as well. Cover the bowl with a moist kitchen towel or a cling wrap.
- Place the bowl in a warm place to proof. Alternatively you can place the bowl inside the oven with it’s light on (do not select bake mode). The heat from the light is sufficient to proof the dough.
- After an hour the dough must have doubled in size. Now, knead the dough again for 5 mins.
- Grease the baking pan with butter and keep aside. Divide the dough into small balls. Roll it between your palms, pull the dough from sides and tuck it underneath. Now, place the tucked side facing down in the greased pan. Repeat the same with remaining dough as well. Cover the dough with a cling wrap or moist kitchen towel and set it aside to proof for another 15 – 30 mins.
- By now the small dough balls might have doubled again. Apply some raw milk (alternative for egg wash) on top of the butter with a brush. This method will give a nice golden brown layer on top.
- Preheat the oven at 400F. My oven had a default time of 6 mins for pre – heating. It varies from oven to oven. So check your manual for the same and follow instructions on the manual.
- Place the pan inside the oven and set the timer for 20 mins. The timing varies from oven to oven. So be sure to check your bun after at least 15 mins of cooking. Mine was perfectly done at 20 mins.
- Remove the pan from oven and brush it with butter. You can remove the buns from pan by running a butter knife asking the edges and cutting it. Pav buns are ready to be served along with soup or pav bhaji.

If you like this recipe and tried it, leave a comment below to let me know how you liked it 🙂 Follow me on Instagram and Facebook
